rebar

How Many Reobars Do You Need for Concrete Reinforcement? A Practical Calculator Guide

What Is Rebar and Why Is It Essential for Concrete Reinforcement?

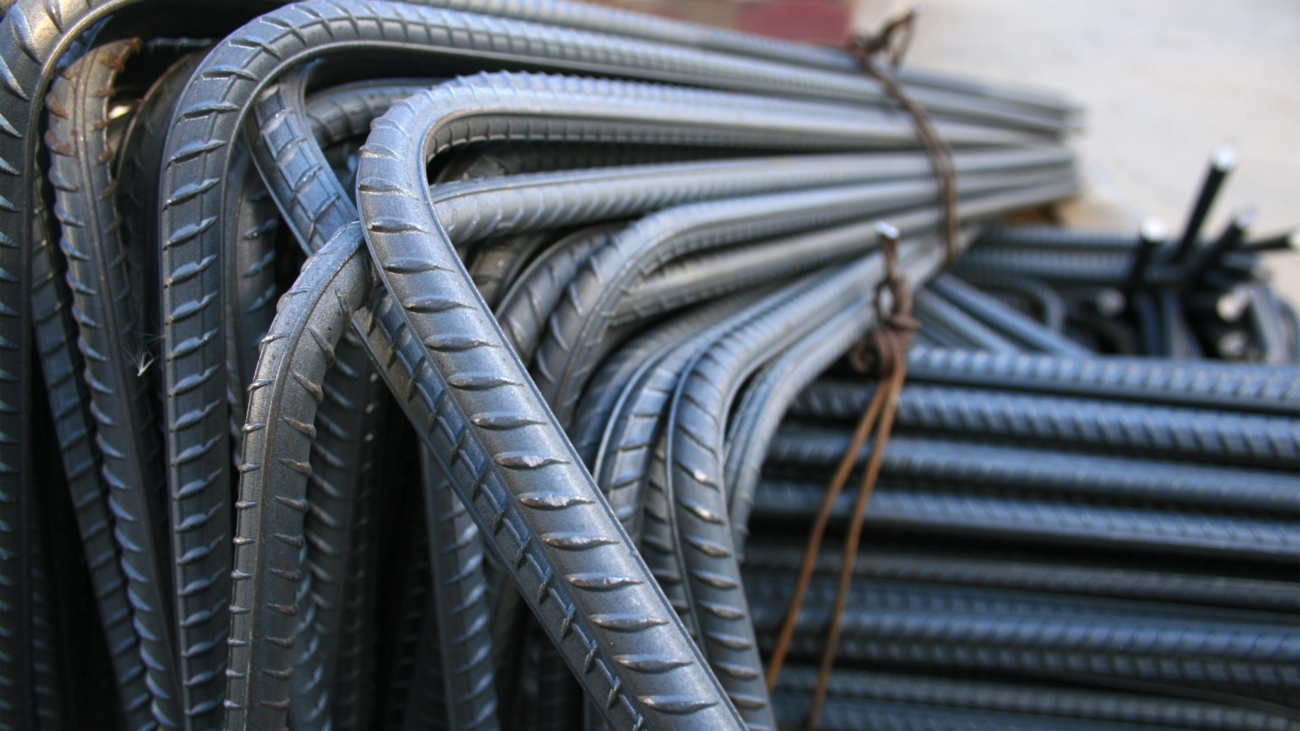
Rebar, short for reinforcing bar, is a patterned steel rod embedded within concrete structures to compensate for concrete’s inherent weakness in tension. These steel bars feature ridges or deformations along their surface, creating a mechanical bond with the surrounding concrete that prevents slippage under load.

Concrete excels at resisting compression but fails dramatically when subjected to tensile (pulling) forces. Rebar addresses this critical limitation by absorbing tensile stresses that would otherwise cause concrete to crack and fail. When loads bend or stretch a concrete element, the embedded steel reinforcement carries these tensile forces while the concrete handles compression.

The reinforcement provides three key structural benefits:

  • Enhanced tensile strength – Steel’s tensile capacity is roughly 100 times greater than concrete, transforming a brittle material into a ductile composite
  • Crack control – The steel mesh distributes loads across the structure, preventing localized stress concentrations that initiate cracks
  • Structural integrity – Even if cracks form, rebar holds the concrete together and maintains load-bearing capacity

Rebar reinforcement appears in virtually every concrete application requiring durability and strength. Residential driveways rely on rebar grids to prevent cracking from vehicle loads and temperature changes. Building foundations use dense rebar cages to support structural loads and resist soil pressure. Concrete slabs in garages, basements, and commercial floors incorporate rebar spacing calculated for their specific load requirements.

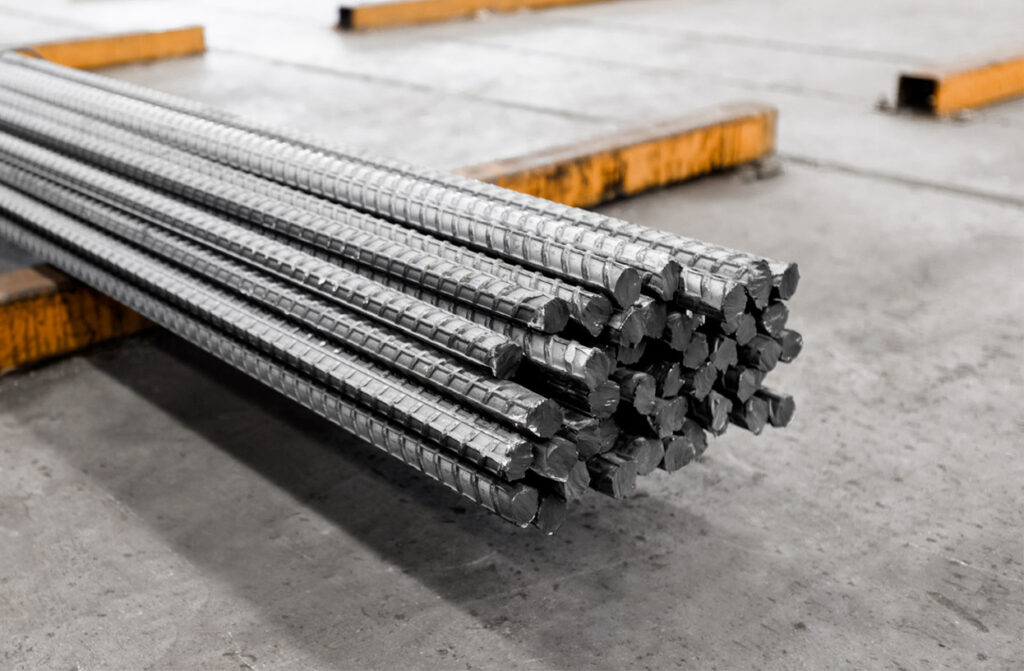
The steel composition typically contains recycled materials, making rebar both cost-effective and environmentally sustainable. Standard rebar consists of carbon steel, though specialized applications may use epoxy-coated or stainless steel variants for corrosion resistance. Understanding how many rebars you need for concrete reinforcement requires calculating the proper grid spacing and quantity to match your project’s structural demands—a process simplified through practical calculator tools designed for this purpose.

How to Find the Right Measurements for Rebar Calculation

Getting the right slab dimensions is crucial for calculating how much rebar you need. You must know the exact length and width of your concrete slab before figuring out how many reinforcing bars to buy.

Step 1: Measure the Slab Dimensions

  1. Use a measuring tape to measure the longest side of your planned concrete pour. This will be your length measurement.
  2. Measure the side that is perpendicular to the length. This will be your width measurement.
  3. If your slab is rectangular, double-check your measurements by ensuring that the opposite sides are equal.
  4. Write down these measurements in either feet or meters, making sure to use the same unit system throughout.

Step 2: Understand Edge Spacing

Edge spacing is the distance from the outer edge of the slab to the first line of rebar. Depending on your project requirements, this measurement usually falls between 2 to 4 inches (50 to 100 mm). Edge spacing is important because it keeps the rebar away from the surface, preventing corrosion or damage to the concrete’s strength.

Step 3: Calculate Grid Dimensions

To find out how much space you have for placing rebar, you’ll need to do some calculations:

  • Grid length = Slab length – (2 × Edge spacing)
  • Grid width = Slab width – (2 × Edge spacing)

These calculations give you the actual area where rebar will be installed. For instance, if you have a 10-foot slab with 3-inch edge spacing, your grid dimension would be 9.5 feet (10 feet – 0.5 feet).

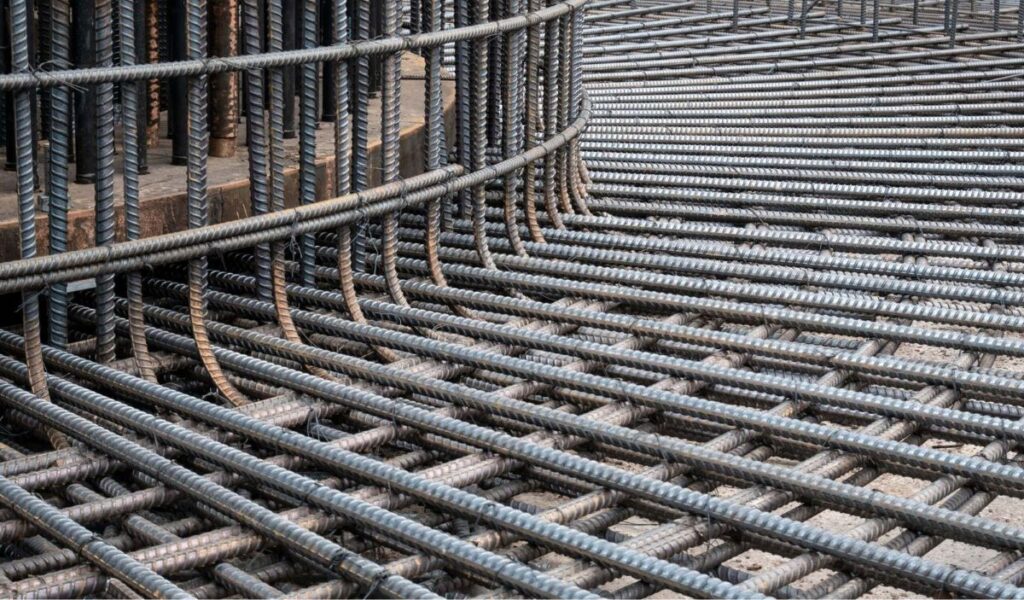
What Role Does Rebar Spacing Play in Calculating Quantity?

Rebar spacing refers to the distance between parallel reinforcing bars within the concrete grid. This measurement directly determines how many bars you’ll need and how effectively your concrete resists cracking under load.

The spacing creates a mesh pattern that distributes stress throughout the structure. Closer spacing means more bars and stronger reinforcement, while wider spacing reduces material costs but may compromise structural integrity. Each bar in the grid works to prevent cracks from spreading, so the distance between them affects the concrete’s ability to handle tension forces.

Common Spacing Standards

Standard rebar spacing typically ranges between these intervals:

  • 12 inches (30 cm): Light-duty applications like residential driveways and thin slabs
  • 18 inches (45 cm): Medium-duty projects including garage floors and standard patios
  • 24 inches (60 cm): Minimal reinforcement for non-structural applications

Heavy-duty commercial projects or areas with significant load requirements may use spacing as tight as 6-8 inches.

Selecting the Right Spacing

Your project’s load-bearing requirements dictate appropriate spacing. Consider the slab thickness, expected weight loads, soil conditions, and local building codes. Thicker slabs supporting heavy equipment need tighter spacing than thin decorative patios. Consulting structural specifications or engineering guidelines ensures your spacing meets safety standards while avoiding unnecessary material waste.

How Can You Calculate the Number of Rebars Needed Using Slab Dimensions and Spacing?

The calculation starts by determining your grid length and grid width, which represent the actual area where rebar will be placed. Subtract twice the edge spacing from both your slab length and slab width. For example, if your concrete slab measures 20 feet by 15 feet with 3 inches of edge spacing, your grid length becomes 19.5 feet (20 – 0.5) and grid width becomes 14.5 feet (15 – 0.5).

Once you have these grid dimensions, divide each by your chosen rebar spacing to find how many bars you need in each direction. Using 12-inch spacing as an example:

  • Vertical bars = Grid length ÷ Spacing = 19.5 feet ÷ 1 foot = 19.5, rounded to 20 bars
  • Horizontal bars = Grid width ÷ Spacing = 14.5 feet ÷ 1 foot = 14.5, rounded to 15 bars

Always round up to the nearest whole number since you cannot install partial rebar pieces. This mathematical approach ensures complete coverage across your concrete slab, creating a uniform reinforcement grid that distributes stress evenly throughout the structure. The precision of these calculations directly impacts material ordering and project costs, making accuracy essential for efficient concrete reinforcement planning.

How Do You Compute Total Rebar Length and Number of Pieces Required?

Total rebar length combines the measurements from both directions of your reinforcement grid using a straightforward formula. Multiply the number of vertical bars by the grid width, then add the result of horizontal bars multiplied by grid length.

The formula looks like this:

Total Length = (Number of Vertical Bars × Grid Width) + (Number of Horizontal Bars × Grid Length)

For example, if you have 8 vertical bars spanning a grid width of 10 feet and 6 horizontal bars spanning a grid length of 12 feet:

  • Vertical contribution: 8 × 10 = 80 feet
  • Horizontal contribution: 6 × 12 = 72 feet
  • Total rebar length: 80 + 72 = 152 feet

Once you know the total length needed, divide this number by the standard length of individual rebar pieces available at your supplier. Standard rebar typically comes in 20-foot or 6-meter lengths, though other sizes exist.

Using the example above with 20-foot pieces:

152 feet ÷ 20 feet = 7.6 pieces

Always round up to the nearest whole number, meaning you’d need 8 rebar pieces to complete your project. This rounding ensures you have sufficient material, accounting for cutting waste and measurement variations during installation.

How Does Rebar Size Affect Your Calculation and Project Cost?

Rebar size directly influences both the structural capacity of your concrete and the total project budget. The diameter you select determines how much load the reinforcement can handle and how many pieces you’ll need to purchase.

Common Rebar Sizes

Rebar comes in standardized dimensions across two measurement systems:

Imperial Sizes (U.S.)

  • #3 (3/8 inch diameter)
  • #4 (1/2 inch diameter)
  • #5 (5/8 inch diameter)
  • #6 (3/4 inch diameter)

Metric Sizes

  • 10mm
  • 12mm
  • 16mm
  • 20mm

Impact on Strength and Quantity

Larger diameter bars provide greater tensile strength but cost more per linear foot. A #6 rebar offers significantly more reinforcement than a #3, meaning you might use fewer bars with wider spacing for the same structural integrity. This trade-off affects your calculation: choosing thicker bars reduces the total number of pieces needed but increases the cost per unit.

Residential slabs typically use #3 or #4 rebar, while commercial projects or heavy-load applications require #5 or #6. The diameter choice depends on expected loads, local building codes, and engineering specifications. Thicker bars also add more weight to transport and handle on-site, influencing labor costs beyond just material expenses.

rebar

What Are the Benefits of Using a Practical Calculator Tool for Rebar Estimation?

A practical calculator tool eliminates manual computation errors and saves significant time when determining how many rebars you need for concrete reinforcement. These digital tools handle multi-step formulas instantly, reducing the risk of miscalculations that could compromise structural integrity or lead to material waste.

Time-Saving Accuracy

Manual calculations require working through multiple formulas—subtracting edge spacing, dividing grid dimensions, and converting measurements. A calculator automates these processes, delivering accurate results in seconds rather than minutes.

Essential Inputs for Most Rebar Calculators

Essential inputs for most rebar calculators include:

  • Slab dimensions: Length and width measurements in feet or meters
  • Edge spacing: Distance from slab perimeter to first rebar line
  • Rebar spacing: Center-to-center distance between parallel bars
  • Individual bar length: Standard piece length (typically 20 feet or 6 meters)
  • Unit price: Cost per rebar piece for budget estimation

The calculator processes these parameters through established formulas, generating outputs for total rebar length needed, number of pieces required, and projected material costs. This comprehensive approach helps contractors and DIY builders make informed purchasing decisions without spreadsheet complexity.

Additional Features of Professional-Grade Calculators

Professional-grade calculators often include additional features like weight calculations, different rebar size options, and the ability to save multiple project estimates for comparison. For instance, understanding the specific requirements outlined in detailed documents can significantly enhance the accuracy of your estimates. Moreover, in regions prone to seismic activities, such as those specified in California’s Seismic Design Criteria, utilizing a practical calculator tool becomes even more essential to ensure all safety standards are met during the rebar estimation process.

Why Should Welding Be Avoided When Working With Rebars?

Welding creates significant welding risks that compromise the structural integrity of reinforcing steel. The intense heat from welding operations alters the molecular structure of rebar, introducing thermal stress that weakens the steel at and around the weld point. This heat-affected zone becomes brittle and loses the flexibility that makes rebar effective at absorbing tensile forces in concrete.

The thermal stress from welding can reduce the steel’s load-bearing capacity by up to 20-30%, creating potential failure points in your concrete structure. The high temperatures also burn away the protective mill scale on rebar surfaces, accelerating corrosion once embedded in concrete. Rapid cooling after welding can cause micro-cracks that propagate over time under structural loads. Check out more about corrosion protection system.

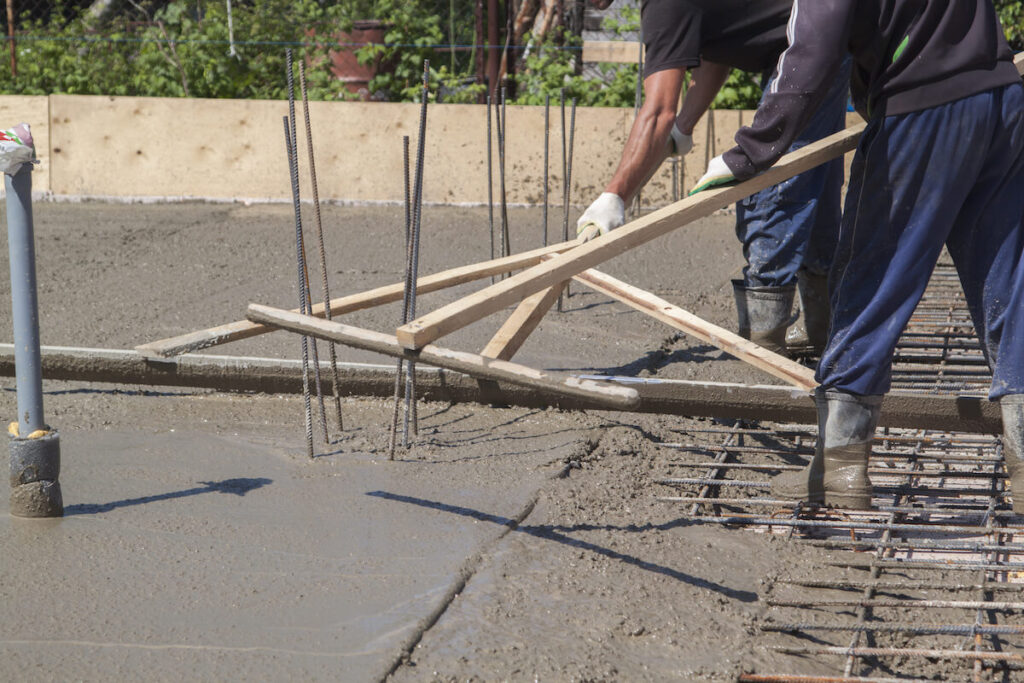
In contrast, steel wire ties provide a safer, more reliable method for securing rebar intersections. These ties:

  • Maintain the original strength properties of the reinforcing steel
  • Allow for slight adjustments during concrete placement
  • Cost significantly less than welding equipment and labor
  • Require minimal training to apply correctly
  • Create flexible connections that accommodate concrete settling

Wire tying, which is a method similar to pattern welding, uses 16-18 gauge annealed steel wire twisted around rebar intersections with pliers or automatic tie guns. This method keeps bars positioned correctly within the formwork while preserving their engineered strength characteristics throughout the concrete’s curing process and service life.

rebar

Conclusion

Proper reinforcement design transforms ordinary concrete into structures that resist cracking, support heavy loads, and last decades longer than unreinforced alternatives. The difference between a driveway that crumbles within years and one that endures for generations often comes down to correct rebar placement and quantity.

How Many Rebars Do You Need for Concrete Reinforcement? A Practical Calculator Guide answers this question through systematic measurement and calculation. Calculator tools eliminate guesswork by processing your project dimensions, spacing preferences, and material specifications into accurate quantities. This precision prevents costly material waste and structural weaknesses.

Best practices matter: measure accurately, maintain consistent spacing, secure bars with wire ties, and verify calculations before pouring. Your concrete project deserves the strength that only proper rebar reinforcement provides.

Related : Temporary Scaffolding: What Does Australian Law Require for Safety and Stability?

reo bar

Buying Reo Bar for Construction: What You Need to Know

Reo bar, or reinforcing bar, plays a crucial role in modern construction. It is essential for providing structural integrity and stability to concrete elements. This article aims to guide you through the intricacies of buying reo bar, detailing what you need to know and the factors influencing your purchase decision.

Understanding Reo Bar: An Overview

Before diving into the buying process, it’s important to understand what reo bar is and its significance in the construction industry. This foundational knowledge will help you make informed decisions when purchasing.

Defining Reo Bar

Reo bar is a steel bar or mesh of steel wires used to reinforce concrete and masonry structures. The presence of this steel improves the tensile strength of the concrete, which is naturally strong in compression but weak in tension. Reo bar is characterized by its ribbed surface, which allows for better mechanical bonding with concrete. The ribbing creates a stronger grip between the reo bar and the concrete, ensuring that they work together effectively under load. This is crucial in applications where structures are subjected to various stresses, such as bending or shear forces.

reo bar

Importance of Reo Bar in Construction

The use of reo bar is essential for various reasons:

  • Structural Integrity: It enhances the strength of concrete, making buildings safe and durable.
  • Resistance to Cracking: Reo bar helps prevent cracks in concrete by increasing its elasticity.
  • Cost-effectiveness: By reinforcing concrete, less material is often needed, leading to overall cost savings in construction projects.

Additionally, the incorporation of reo bar can significantly extend the lifespan of a structure. In environments where concrete is exposed to harsh conditions, such as saltwater or extreme temperatures, the protective qualities of reo bar can help mitigate the effects of corrosion and wear. This is particularly important in coastal construction or infrastructure projects like bridges and tunnels, where long-term durability is paramount. Furthermore, the use of reo bar can also enhance the sustainability of construction practices, as it allows for the use of thinner concrete sections while maintaining structural performance, ultimately reducing the carbon footprint associated with material usage.

Moreover, the versatility of reo bar makes it suitable for a wide range of applications, from residential buildings to large-scale commercial projects. Different grades and sizes of reo bar can be selected based on the specific requirements of a project, allowing engineers and architects to tailor their designs effectively. Advanced construction techniques, such as pre-stressed concrete, also utilize reo bar to achieve even greater strength and performance, showcasing its critical role in modern engineering solutions. Understanding these aspects of reo bar not only aids in making informed purchasing decisions but also highlights its vital contribution to safe and efficient construction practices.

Factors to Consider When Buying Reo Bar

When you decide to purchase reo bar, several factors come into play that can affect your choice. Being aware of these factors can help you avoid pitfalls and select the best products for your needs.

Material Quality

The quality of material used in the production of reo bar is paramount. High-quality steel ensures longevity and durability, making it imperative to check for certifications such as ASTM A615 or A706 that specify the standards required for the steel’s composition, strength, and ductility.

Additionally, assessing corrosion resistance can significantly influence the development and longevity of the structure. Always request test reports from suppliers to confirm the quality of the reo bar being offered. Furthermore, consider the environmental impact of the materials used. Some manufacturers are now producing eco-friendly steel options that not only meet the necessary strength requirements but also reduce the carbon footprint associated with traditional steel production. This is an important consideration for projects aiming for sustainability and compliance with green building standards. Learn more about environmental at https://www.epa.gov/education/what-environmental-education

Size and Weight

Reo bar comes in various sizes and weight categories, and these specifications need to align with your project requirements. Commonly, you will find reo bar categorized by diameter (typically from 10 mm to 40 mm), and its weight can influence the logistics of transportation and handling on site.

Understanding the structural needs of your construction project will help you choose the appropriate size. Consult with a structural engineer if necessary to determine the right specifications. Additionally, it’s beneficial to familiarize yourself with the different grades of reo bar available, as each grade has unique properties that may be more suitable for specific applications, such as seismic resistance or heavy load-bearing scenarios. Knowing the right grade can enhance the overall safety and efficiency of your construction project.

Price Considerations

Pricing is a critical factor in any purchasing decision. The cost of reo bar can fluctuate based on market demand, steel prices, and regional availability. It’s essential to compare quotes from multiple suppliers while factoring in shipping or delivery costs that may apply.

However, be cautious of deals that seem too good to be true, as they may compromise on quality. Remember, investing slightly more in high-quality reo bar can save you costly repairs and enhance structural safety in the long term. Additionally, consider the potential for bulk purchasing discounts if your project requires a large quantity of reo bar. Building a relationship with suppliers may also yield benefits such as better pricing, priority service, and access to exclusive products that can further enhance your project’s success. Always keep an eye on market trends, as fluctuations in steel prices can impact your budget and project timeline significantly.

The Buying Process: A Step-by-Step Guide

Having understood the nuances of reo bar, the next step is navigating the buying process. Following these steps will ensure that you select the right product from a reliable source.

Identifying Reliable Suppliers

Start your purchasing journey by identifying reputable suppliers. Research local vendors known for their quality products and solid customer service. Consider looking at online reviews and asking for recommendations from other construction professionals.

It’s beneficial to visit suppliers in person if possible. This allows you to inspect their inventory and ask specific questions regarding quality, certifications, and practices in place for ensuring product integrity. Building a rapport with suppliers can also lead to better service and potential discounts, as they may prioritize customers who show genuine interest and commitment to their products.

Additionally, attending industry trade shows and expos can be an excellent way to meet multiple suppliers at once. These events often showcase the latest innovations in construction materials, giving you the chance to compare different products side by side. Networking with other professionals at these events can provide insights into which suppliers are most trusted within the community.

Making an Informed Purchase

Once you’ve identified potential suppliers, it’s time to make informed purchase decisions. When contacting suppliers, don’t hesitate to ask for detailed information about their products, including materials, specifications, and delivery timelines.

After evaluating your options, choose a supplier that not only meets your cost requirements but also aligns with your quality expectations. Ensure to finalize the purchase in writing to avoid misunderstandings later on. Be sure to clarify the terms of the sale, including payment methods, return policies, and warranty information, as these factors can significantly impact your overall satisfaction with the purchase. To know more about expectations click here.

Furthermore, consider the logistics of your order. Understanding the lead times for delivery and the supplier’s capacity to meet your schedule is crucial, especially in construction where timelines are often tight. If possible, establish a timeline for delivery that aligns with your project milestones to prevent delays. This proactive approach can help you maintain momentum on your project and avoid costly downtime.

Common Mistakes to Avoid When Buying Reo Bar

Even seasoned professionals can make mistakes when purchasing reo bar. Avoiding these common pitfalls will ensure a smoother buying process.

Overlooking Material Quality

One of the most significant mistakes is undervaluing the importance of material quality. Suppliers may offer lower-priced reo bar, but if it fails to meet safety standards, the consequences could be dire. Always prioritize quality over price when selecting reo bar that will form the backbone of a structure. High-quality reo bar not only enhances the durability of concrete but also provides better resistance to corrosion, which is crucial in environments exposed to moisture or chemicals. Investing in superior materials can save you from costly repairs and structural failures down the line.

reo bar

Ignoring Supplier Reputation

Failing to consider the reputation of your supplier can lead to poor purchasing decisions. A supplier with a history of unreliable service or subpar products can jeopardize the integrity of your project. Invest some time into researching their history and, if possible, seek testimonials from previous clients. Additionally, consider the supplier’s ability to provide timely deliveries and their responsiveness to customer inquiries. A reputable supplier should not only offer quality products but also demonstrate a commitment to customer service, ensuring that you receive the support you need throughout your project.

Neglecting to Verify Specifications

Another common oversight is neglecting to verify the specifications of the reo bar you are purchasing. Each construction project may have unique requirements based on load-bearing needs, environmental conditions, and design specifications. Failing to match the reo bar’s diameter, grade, and length to your project’s needs can lead to significant structural issues. Always double-check the specifications against your project plans and consult with your structural engineer if necessary to ensure that you are selecting the correct type of reo bar for your specific application.

Not Considering Local Regulations

It’s also important to be aware of local building codes and regulations when purchasing reo bar. Different regions may have specific requirements regarding the types of materials that can be used in construction projects. Not adhering to these regulations can result in fines, project delays, or even the need to redo work that does not meet local standards. Before making a purchase, familiarize yourself with the relevant codes and ensure that the reo bar you are considering complies with all necessary regulations. This proactive approach will help you avoid potential legal issues and ensure that your project proceeds smoothly.

Maintenance and Care for Reo Bar

After purchasing reo bar, the responsibility doesn’t end there. Proper maintenance and care are essential to ensure that your investment remains intact throughout the construction process and in the structures built subsequently.

Proper Storage

Reo bar must be stored correctly to prevent damage and corrosion. Ideally, it should be kept in a dry place, elevated off the ground to avoid any moisture exposure. Considering the weight of the bars, ensure you use appropriate lifting tools when moving them to avoid injuries.

Covering the bars with a tarp can also help protect them from the elements, especially in areas prone to rain or humidity. This is crucial for maintaining their quality and performance in your construction project.

Regular Inspection and Cleaning

Routine inspections should be conducted to check for any signs of rust or damage. If you notice any issues, take immediate steps to rectify them. Regular cleaning of the bars can help mitigate corrosion, especially if they have been exposed to dust, grime, or other corrosive environments.

Implementing a maintenance schedule that outlines when to inspect and clean the reo bar can help ensure that they remain in top-notch condition and will perform their required function effectively.

In conclusion, purchasing reo bar requires careful consideration of various factors to ensure you select the best products for your construction needs. By understanding what reo bar is, the buying process, and common pitfalls to avoid, you can enhance the structural integrity of your projects significantly.

Click here to read about safety strips construction.

construction

How Safety Strip Enhances Site Safety in Construction

Construction sites are inherently hazardous environments where safety must be a priority. One of the innovative solutions that contribute significantly to enhancing site safety is the use of safety strips. These strips help improve visibility and manage safety hazards effectively. This article explores how safety strips play a critical role in construction, their impact on site safety, implementation practices, and the future of this technological advancement.

Understanding the Role of Safety Strips in Construction

Safety strips are specially designed materials deployed in various areas of construction sites to demarcate safe pathways, alert workers to potential hazards, and ensure overall safety. They serve multiple functions—ranging from preventing access to dangerous zones to guiding personnel through safe routes.

Defining Safety Strips: What They Are and How They Work

Safety strips are usually made of high-visibility materials such as reflective tape, colored plastics, or durable warnings, which can withstand harsh outdoor conditions. They work by providing visual cues that attract attention and indicate safety zones or hazardous areas. For instance, bright yellow strips might outline a perimeter where heavy machinery is operational, while fluorescent orange can indicate areas under construction.

When installed correctly, these strips can significantly reduce the risk of accidents. Their vivid colors and distinctive patterns alert workers and visitors, prompting them to exercise caution and adhere to safety protocols. Using safety strips aligns with the standards governing workplace safety, ensuring that employers maintain compliance with industry regulations.

construction

The Importance of Safety Strips in Construction Sites

The importance of safety strips cannot be overstated. In an industry where the risk of accidents is high, these strips serve as a simple yet effective tool to enhance safety. They help in imparting quick information at a glance, making it easier for workers to navigate potentially dangerous areas without needing elaborate signage.

Moreover, safety strips can contribute to fostering a safety-centric culture on-site. By routinely replacing and maintaining safety strips, companies show their commitment to providing a secure working environment, which can enhance morale and productivity among workers. A vigilant approach to installing safety strips embodies a proactive stance on safety management.

In addition to their visual impact, safety strips can also be equipped with tactile features that provide additional sensory feedback. For example, some strips may have raised patterns or textures that can be felt underfoot, alerting workers to changes in terrain or the presence of obstacles. This multi-sensory approach not only aids those who may have visual impairments but also reinforces the message of caution through physical interaction. Furthermore, the strategic placement of safety strips can be tailored to specific tasks or workflows, ensuring that they are not only visible but also contextually relevant to the activities being performed in that area.

Training workers to recognize and respond to safety strips is another crucial aspect of their effectiveness. Regular safety briefings can help reinforce the importance of these visual indicators, ensuring that all personnel understand their meanings and the actions required when encountering them. This ongoing education can transform safety strips from mere markers into integral components of a comprehensive safety strategy, empowering workers to take an active role in maintaining a safe work environment. By integrating safety strips into the broader safety management framework, organizations can create a more resilient and aware workforce, ultimately leading to a reduction in accidents and injuries on construction sites.

Read more at: Buying Reo Bar for Construction

The Impact of Safety Strips on Site Safety

Safety strips have a profound impact on the overall safety and efficiency of construction operations. By influencing worker behavior and improving navigation, these strips play a crucial role in accident prevention and hazard reduction.

Reducing Accidents and Injuries with Safety Strips

The prevalence of slips, trips, and falls in construction workplaces can be reduced significantly with the effective deployment of safety strips. By marking different zones, safety strips guide workers away from hazardous areas and direct them toward safer paths.

Statistical data supports the effectiveness of safety strips. Studies indicate that construction sites with clear safety markings experience lower rates of incidents. For example, sites that employed bright, well-placed safety strips reported a decline in the number of accidents attributed to environmental factors. This reduction not only protects workers but also minimizes downtime and associated costs for employers, creating a win-win situation for both parties involved. Find more about accidents at https://www.cedarville.edu/offices/campus-security/accident/definition

Enhancing Visibility and Awareness on Construction Sites

Construction sites often deal with limited visibility due to factors such as poor lighting and weather conditions. The high visibility of safety strips addresses this challenge effectively. Workers are alerted to critical areas, making it easier to navigate, especially in low-light conditions.

Additionally, the presence of safety strips can enhance the overall situational awareness among workers. Knowing where hazards are located promotes vigilance and careful maneuvering, which contributes to a safer working environment. Workers become accustomed to observing these markers, reinforcing a constant awareness of their surroundings. Furthermore, safety strips can be integrated with other safety measures, such as signage and barriers, to create a comprehensive safety strategy that ensures all potential risks are clearly communicated. This multi-layered approach not only reinforces the importance of safety but also fosters a culture of accountability and responsibility among the workforce.

Implementing Safety Strips in Your Construction Site

Transitioning to a construction site that prioritizes safety strips involves strategic planning and execution. It’s vital to choose the right materials, plan placement wisely, and ensure regular maintenance.

Choosing the Right Safety Strips for Your Site

Selecting safety strips is critical to maximizing their effectiveness. Factors to consider include visibility, durability, and environmental conditions on site. For example, reflective strips are most effective in low-light areas, while brightly colored non-reflective materials may work well in daylight.

Moreover, ensuring that the strips have the right adhesive for attachment to different surfaces is essential. Some surfaces may require specific adhesives to maintain the integrity of the strips, particularly in outdoor environments exposed to the elements. Additionally, considering the foot traffic and machinery movement in the area can influence the choice of material; thicker, more robust strips may be necessary in high-traffic zones to withstand constant wear and tear.

Best Practices for Installing and Maintaining Safety Strips

Installing safety strips is not merely about placing them haphazardly; it requires a well-thought-out plan. Best practices include assessing construction plans to select high-risk areas for placement and ensuring that strips are placed where they will effectively grab attention. It is also beneficial to involve workers in the planning process, as they can provide insights into areas that may pose risks based on their daily experiences on site.

Regular maintenance of safety strips is equally important. Over time, wear and tear can diminish their effectiveness. It’s critical to monitor their condition and replace or repair them as needed to maintain high visibility and function. Additionally, training workers on the significance of the strips and encouraging them to report any damage plays a vital role in safety management. Implementing a routine inspection schedule can help identify issues before they become critical, ensuring that safety remains a top priority. Furthermore, utilizing visual reminders, such as posters or digital alerts, can reinforce the importance of maintaining these safety features and keeping the entire team vigilant about their surroundings.

The Future of Safety Strips in Construction

The evolving landscape of technology and construction practices promises exciting developments in safety strip innovation. As construction sites continue to incorporate advanced safety measures, safety strips will likely evolve to meet these new challenges.

Innovations in Safety Strip Technology

Future safety strips may incorporate smart technology, including sensors that alert workers of hazards through mobile applications. Learning from data analytics, these innovations will enhance the ability to respond to emerging safety challenges dynamically. Furthermore, integrating RFID chips into safety strips could help track materials and monitor site conditions in real-time, adding another layer of safety. Click here to learn more about integrating.

Research into new materials may also lead to the development of more durable safety strips that maintain their visibility and adhesion in extreme conditions. Enhanced materials would contribute to long-lasting solutions that require less frequent replacement, ultimately benefiting construction budgets and project timelines. Additionally, the potential for glow-in-the-dark or luminescent safety strips could significantly improve visibility during low-light conditions, such as early morning or late evening work hours, further enhancing worker safety.

safety strip

The Long-Term Benefits of Using Safety Strips

Implementing safety strips at construction sites not only addresses immediate safety concerns but also presents long-term advantages. For example, a consistent commitment to safety can lead to reduced insurance costs over time, as companies with lower accident rates tend to pay less in premiums.

Furthermore, fostering a culture of safety through the use of well-placed safety strips kindles a sense of responsibility among workers. When employees understand the importance of adhering to safety guidelines signified by these strips, it leads to collective efforts in upholding a safe and productive work environment. This cultural shift can also enhance team morale, as workers feel more secure and valued in an environment that prioritizes their well-being. Moreover, as safety becomes ingrained in the daily operations of a construction site, it can attract top talent who prioritize working for companies that demonstrate a strong commitment to safety and health standards.

In addition, the implementation of safety strips can serve as a training tool for new employees. By familiarizing them with the layout of safety measures and the importance of compliance, these strips can help instill safe practices from day one. This proactive approach not only reduces the likelihood of accidents but also promotes a more informed workforce that is aware of their surroundings and potential hazards. As the construction industry continues to evolve, the integration of safety strips will remain a fundamental aspect of ensuring that safety is not just a priority, but a core value within the industry.